Lambda handler code #
We’ll start with the AWS Lambda handler code.
- Create a directory
lambdain the root of your project tree (next tobinandlib). - Add a file called
lambda/hello.tswith the following contents:
import { APIGatewayProxyEvent } from "aws-lambda";

export const handler = async (event: APIGatewayProxyEvent) => {
  return {
    statusCode: 200,
    headers: { "Content-Type": "text/plain" },
    body: `Hello, CDK! You've hit ${event.path}\n`,
  };
};
This is a simple Lambda function which returns the text “Hello, CDK! You’ve hit [url path]”. The function’s output also includes the HTTP status code and HTTP headers. These are used by API Gateway to formulate the HTTP response to the user.
This lambda is provided in TypeScript. For more information on writing lambda functions in your language of choice, please refer to the AWS Lambda documentation here.
Install the AWS Lambda construct library #
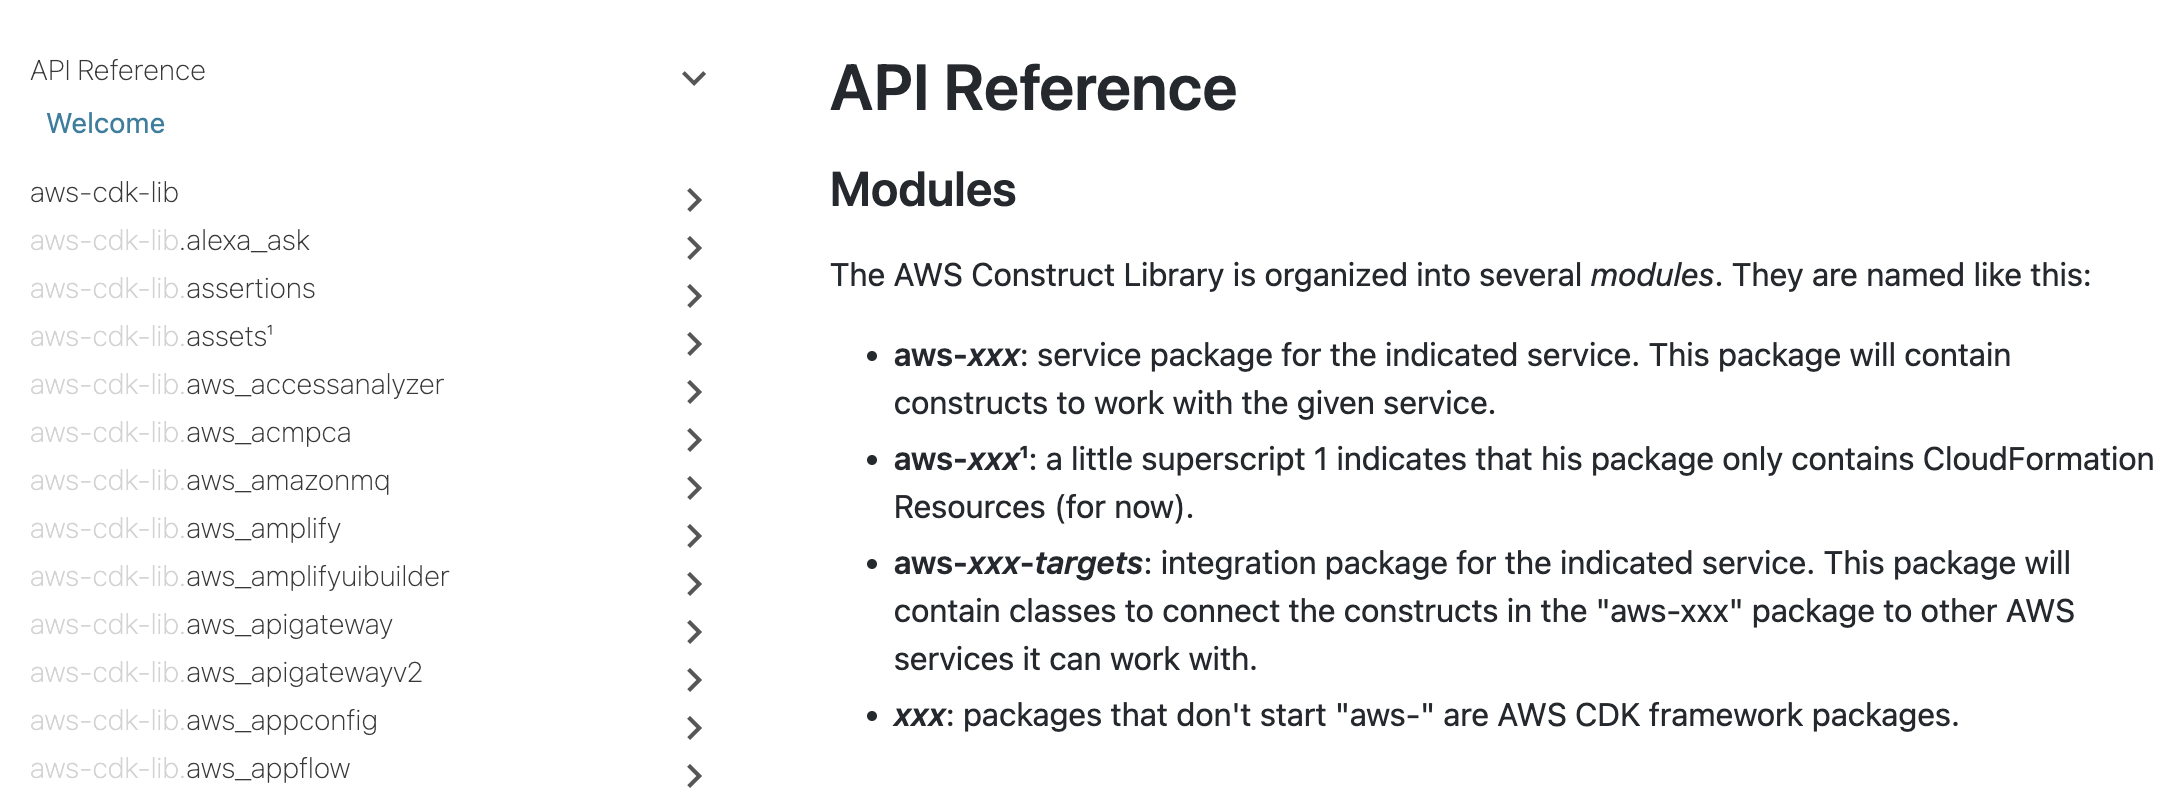
The AWS CDK is shipped with an extensive library of constructs called the AWS Construct Library. The construct library is divided into modules, one for each AWS service. For example, if you want to define an AWS Lambda function, we will need to use the AWS Lambda construct library.
To discover and learn about AWS constructs, you can browse the AWS Construct Library reference.
A few words about copying & pasting in this workshop #
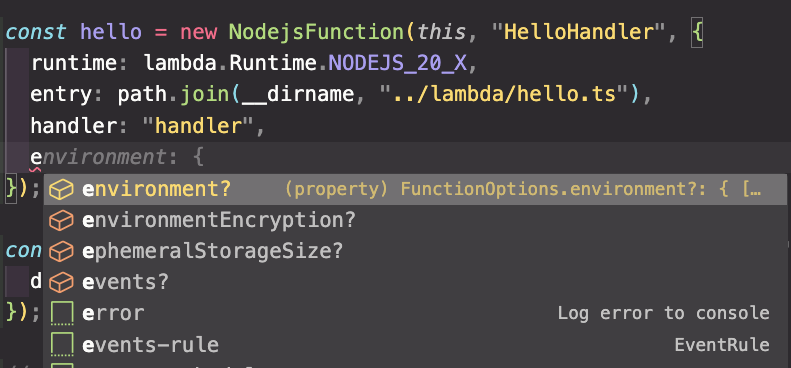
In this workshop, we highly recommended to type CDK code instead of copying & pasting (there’s usually not much to type). This way, you’ll be able to fully experience what it’s like to use the CDK. It’s especially cool to see your IDE help you with auto-complete, inline documentation and type safety.
Add an AWS Lambda Function to your stack #
Add an import statement for lambda and NodejsFunction at the beginning of lib/cdk-workshop-stack.ts, and then add a
NodejsFunction to your stack.
import * as cdk from 'aws-cdk-lib';
import * as lambda from 'aws-cdk-lib/aws-lambda';
import { NodejsFunction } from "aws-cdk-lib/aws-lambda-nodejs";
import * as path from "path";

export class CdkWorkshopStack extends cdk.Stack {
  constructor(scope: cdk.App, id: string, props?: cdk.StackProps) {
   super(scope, id, props);

   // defines an AWS Lambda resource
   const hello = new NodejsFunction(this, "HelloHandler", {
      runtime: lambda.Runtime.NODEJS_20_X,
      entry: path.join(__dirname, "../lambda/hello.ts"),
      handler: "handler",
   });

  }

}
A few things to notice:
- Our function uses the NodeJS (
NODEJS_20_X) runtime. - The code is loaded from the
lambda/hello.tsfile which we created earlier. Path is relative to this code which is why we need to exit thelibfolder with../at the start of the path. - The name of the exported handler function is
handler.
A word about constructs and constructors #
As you can see, the class constructors of both CdkWorkshopStack and
NodejsFunction (and many other classes in the CDK) have the signature
(scope, id, props). This is because all of these classes are constructs.
Constructs are the basic building block of CDK apps. They represent abstract
“cloud components” which can be composed together into higher level abstractions
via scopes. Scopes can include constructs, which in turn can include other
constructs, etc.
Constructs are always created in the scope of another construct and must always have an identifier which must be unique within the scope it’s created. Therefore, construct initializers (constructors) will always have the following signature:
scope: the first argument is always the scope in which this construct is created. In almost all cases, you’ll be defining constructs within the scope of current construct, which means you’ll usually just want to passthisfor the first argument. Make a habit out of it.id: the second argument is the local identity of the construct. It’s an ID that has to be unique amongst construct within the same scope. The CDK uses this identity to calculate the CloudFormation Logical ID for each resource defined within this scope. To read more about IDs in the CDK, see the CDK user manual.props: the last (sometimes optional) argument is always a set of initialization properties. Those are specific to each construct. For example, thelambda.Functionconstruct accepts properties likeruntime,codeandhandler. You can explore the various options using your IDE’s auto-complete or in the online documentation.
Diff #
Save your code, and let’s take a quick look at the diff before we deploy:
cdk diff
Output would look like this:
Stack CdkWorkshopStack
IAM Statement Changes
┌───┬─────────────────────────────────┬────────┬────────────────┬──────────────────────────────┬───────────┐
│   │ Resource                        │ Effect │ Action         │ Principal                    │ Condition │
├───┼─────────────────────────────────┼────────┼────────────────┼──────────────────────────────┼───────────┤
│ + │ ${HelloHandler/ServiceRole.Arn} │ Allow  │ sts:AssumeRole │ Service:lambda.amazonaws.com │           │
└───┴─────────────────────────────────┴────────┴────────────────┴──────────────────────────────┴───────────┘
IAM Policy Changes
┌───┬─────────────────────────────┬────────────────────────────────────────────────────────────────────────────────┐
│   │ Resource                    │ Managed Policy ARN                                                             │
├───┼─────────────────────────────┼────────────────────────────────────────────────────────────────────────────────┤
│ + │ ${HelloHandler/ServiceRole} │ arn:${AWS::Partition}:iam::aws:policy/service-role/AWSLambdaBasicExecutionRole │
└───┴─────────────────────────────┴────────────────────────────────────────────────────────────────────────────────┘
(NOTE: There may be security-related changes not in this list. See https://github.com/aws/aws-cdk/issues/1299)

Parameters
[+] Parameter AssetParameters/3342065582ab8a3599385f447c9f5d5b141c726eb5dc468594ec8450a97f3cb7/S3Bucket AssetParameters3342065582ab8a3599385f447c9f5d5b141c726eb5dc468594ec8450a97f3cb7S3BucketEB5CA0D6: {"Type":"String","Description":"S3 bucket for asset \"3342065582ab8a3599385f447c9f5d5b141c726eb5dc468594ec8450a97f3cb7\""}
[+] Parameter AssetParameters/3342065582ab8a3599385f447c9f5d5b141c726eb5dc468594ec8450a97f3cb7/S3VersionKey AssetParameters3342065582ab8a3599385f447c9f5d5b141c726eb5dc468594ec8450a97f3cb7S3VersionKeyC5F120D1: {"Type":"String","Description":"S3 key for asset version \"3342065582ab8a3599385f447c9f5d5b141c726eb5dc468594ec8450a97f3cb7\""}
[+] Parameter AssetParameters/3342065582ab8a3599385f447c9f5d5b141c726eb5dc468594ec8450a97f3cb7/ArtifactHash AssetParameters3342065582ab8a3599385f447c9f5d5b141c726eb5dc468594ec8450a97f3cb7ArtifactHashBAACCCD2: {"Type":"String","Description":"Artifact hash for asset \"3342065582ab8a3599385f447c9f5d5b141c726eb5dc468594ec8450a97f3cb7\""}

Resources
[+] AWS::IAM::Role HelloHandler/ServiceRole HelloHandlerServiceRole11EF7C63
[+] AWS::Lambda::Function HelloHandler HelloHandler2E4FBA4D
As you can see, this code synthesizes an AWS::Lambda::Function resource. It also synthesized a couple of CloudFormation parameters that are used by the toolkit to propagate the location of the handler code.
Deploy #
Let’s deploy:
cdk deploy
If there are errors #
To compile the TypeScript code into JavaScript, the NodejsFunction constuct uses esbuild. This does mean that you need to have docker installed and running on your machine.
Installation of Docker is relatively simple and can be set up from this page. The first time running cdk deploy after installing Docker takes a few minutes as esbuilds needs to be downloaded too.
If you had to install Docker, rerun cdk deploy.
You’ll notice that cdk deploy not only deployed your CloudFormation stack, but
also archived and uploaded the lambda directory from your disk to the
bootstrap bucket.
Testing our function #
Let’s go to the AWS Lambda Console and test our function.
-
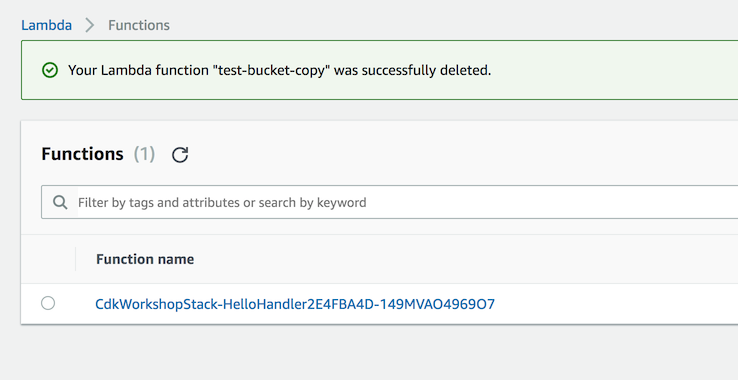
Open the AWS Lambda Console (make sure you are in the correct region).
You should see our function:
-
Click on the function name to go to the console.
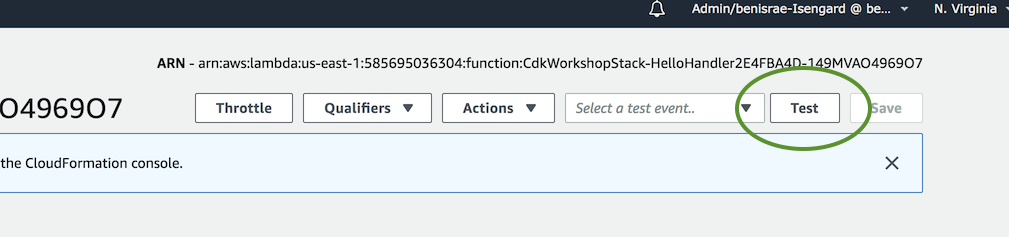
-
Click on the Test button to open the Configure test event dialog:
-
Select Amazon API Gateway AWS Proxy from the Event template list.
-
Enter
testunder Event name.
-
Hit Create.
-
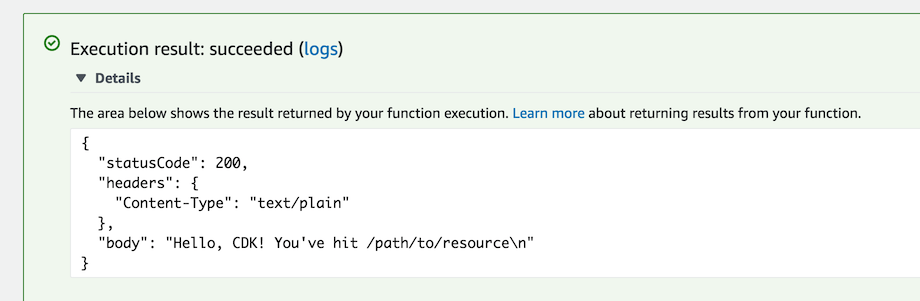
Click Test again and wait for the execution to complete.
-
Expand Details in the Execution result pane and you should see our expected output: